I finished another t-shirt for Anya. She’s been enamored with horses lately, so my timing is perfect.
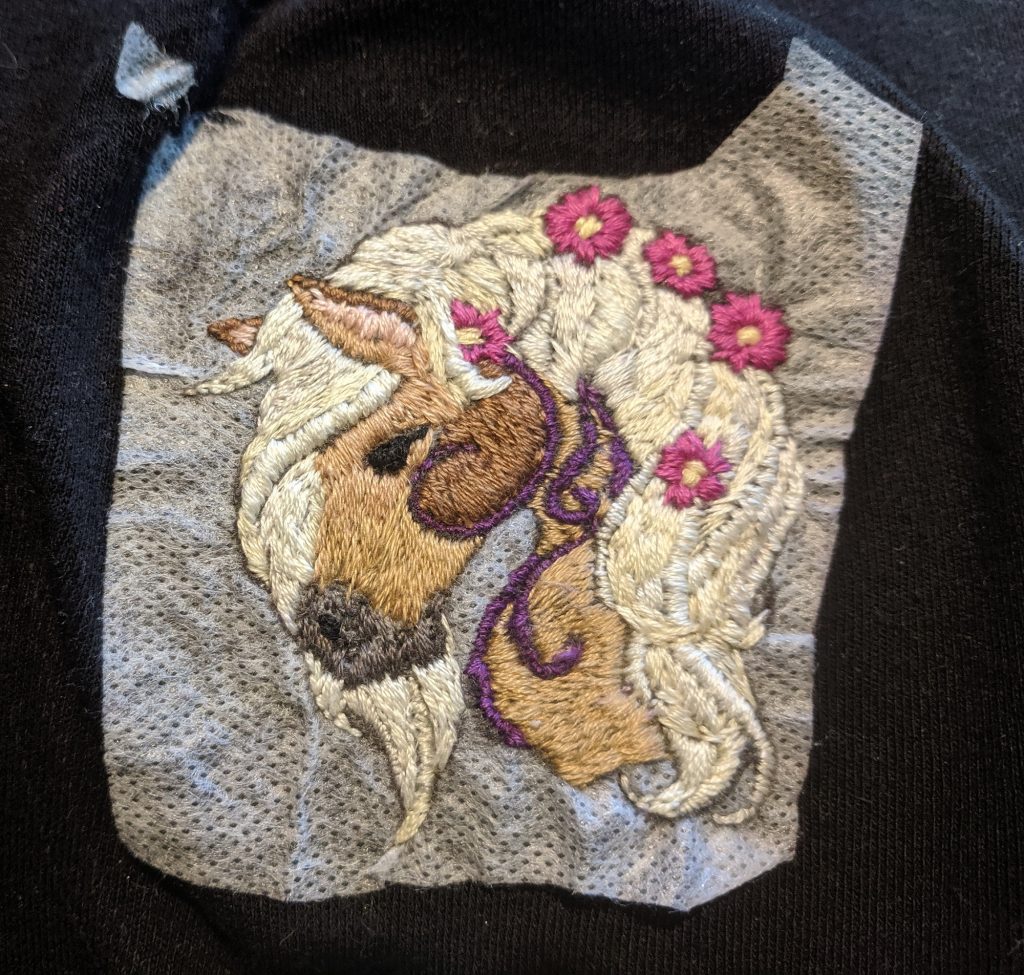
I finished another t-shirt for Anya. She’s been enamored with horses lately, so my timing is perfect.
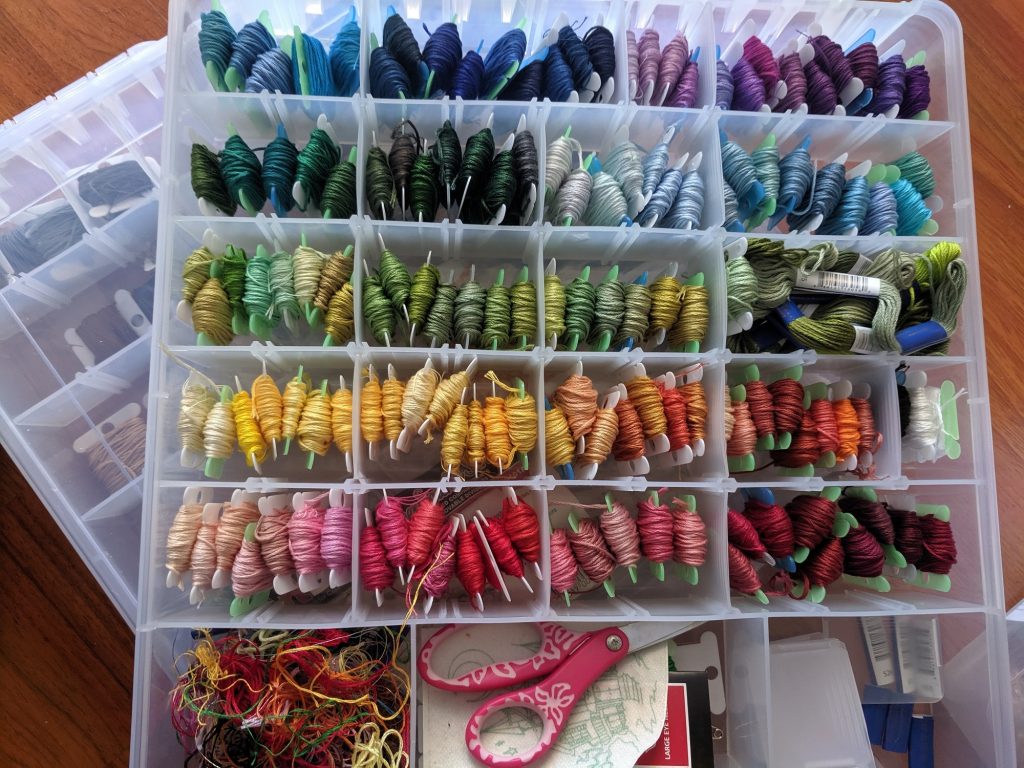
Two years ago, I picked up a bunch of ArtBin 9101AB boxes for 9$ each in a pre-Christmas sale. They stack nicely, and I use them to store zippers, fold over elastic, sewing feet, beads … all sorts of craft supplies. I’m trying to use them to store my embroidery thread. I have a lot — a whole rainbow of colors, plus another box with grays, browns, and ‘special’ thread (metallic, glow in the dark). But the little bobbin cards aren’t quite big enough. It’s still an improvement over random skeins of thread, and unused portions can be wrapped around the bobbin card to ensure you know exactly which light blue that bit is. Hopefully I’ll come up with something that keeps these things upright … other than stuffing the box so there’s nowhere for them to move 😀
I finally got larger blank t-shirts for Anya. Anya and I will spend an hour or two in the evening relaxing and embroidering the shirts. About nine shirt-sized images fit on a 8.5″x11″ sheet of dissolving, printable transfer paper. I’ll create a single image and arrange all of the embroidery patterns to fill the page (needs to be black lines on a white background as the printout is fuzzy, and color or gray-scale makes a big mess). Cut out one image, stick it onto a shirt, add a hoop (I love Darice’s spring tension hoops!), and go.
I taught Anya to back-stitching along lines last year, and I taught her how to make a satin stitch today. She’s working on a cute little owl. I’m working on this hand embroidery pattern from Urban Threads. Should be finished tomorrow too!
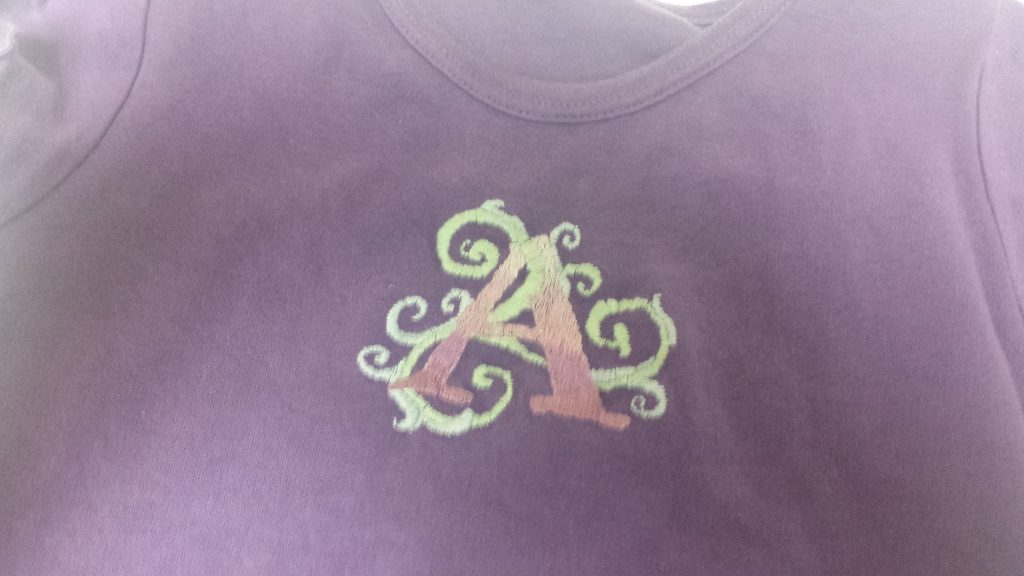
Another thread painting project — the ‘A’ has an ombre effect.
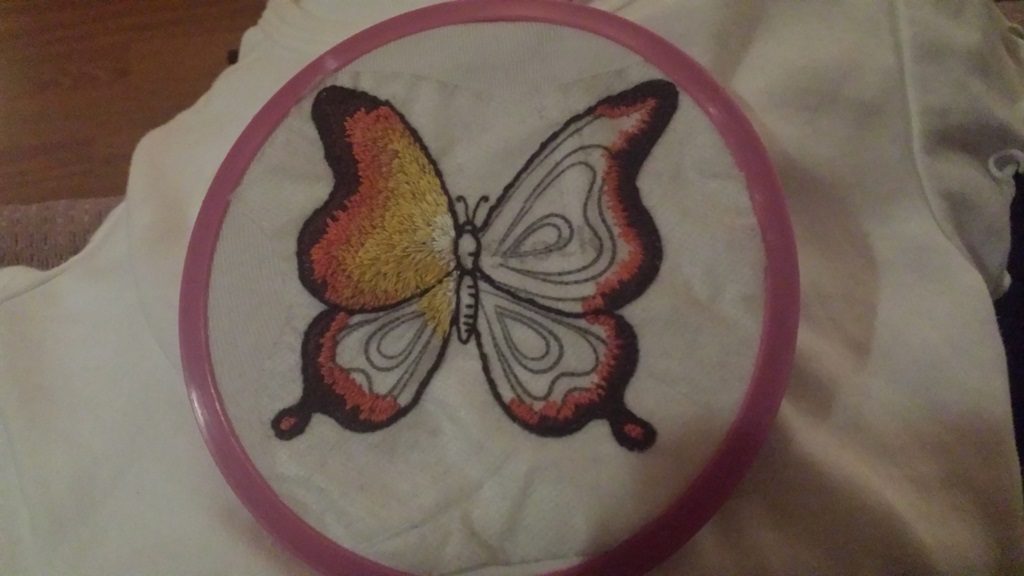
I’ve seen various iterations of needle painting (thread painting, needle shading) and am finally trying it. While the technique isn’t difficult, it is seriously time consuming. Fortunately, Anya loves the butterfly thus far. I’ll probably make another shirt or two using this technique … but start with a size 6 or 7 shirt so she gets years of wearing it (and most of the embroidered shirts will either become a t-shirt quilt or appliqué patches on a larger shirt)
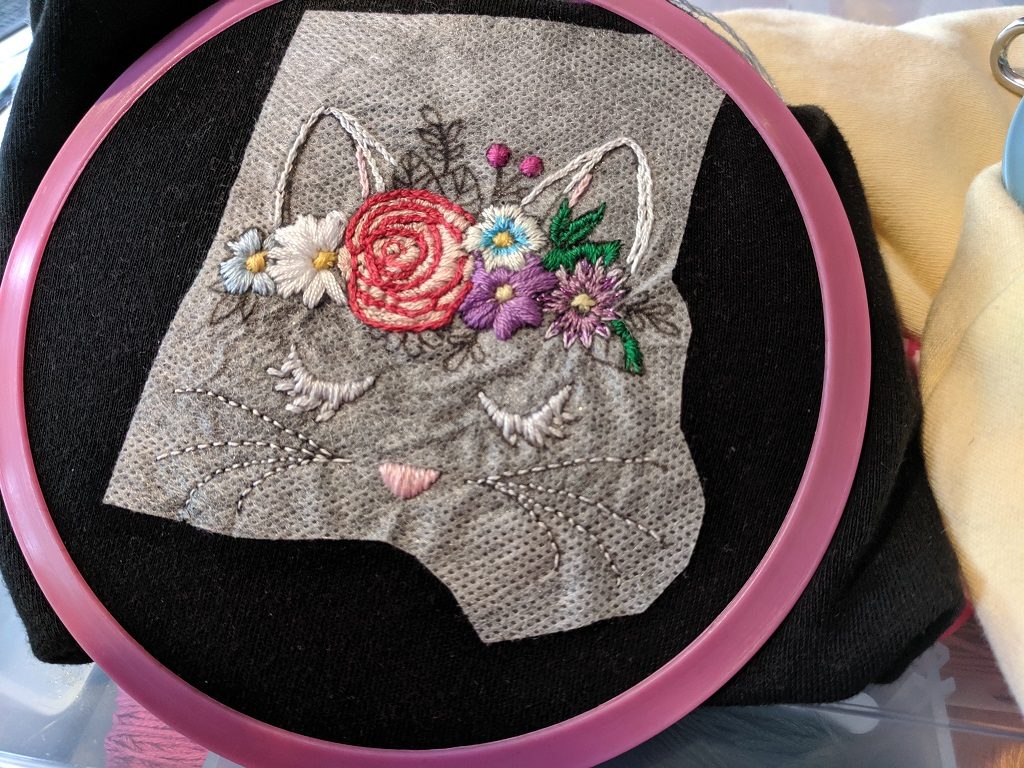
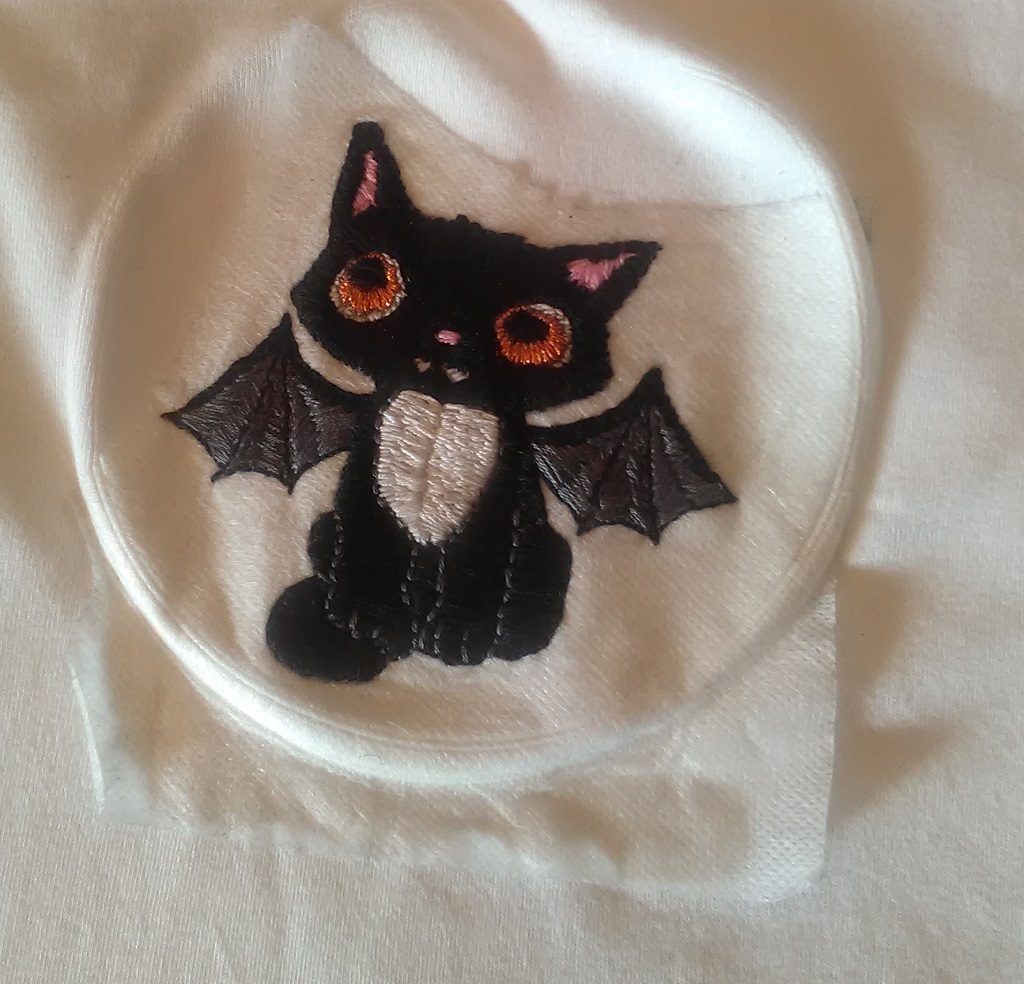
Anya will soak the shirt later today to dissolve the transfer paper, so it’s not quite done. But here’s her Halloween kitten t-shirt. The pattern is from Urban Threads — an awesome place for hand and machine embroidery patterns.
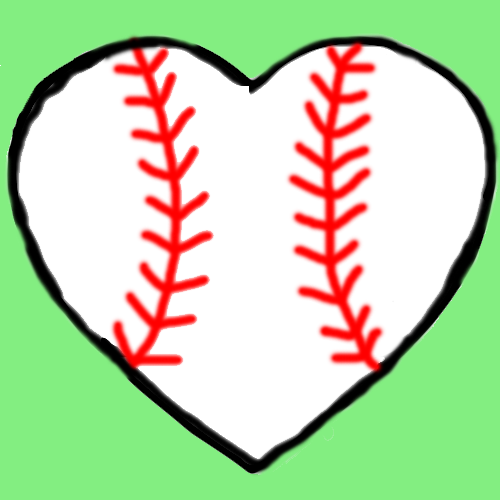
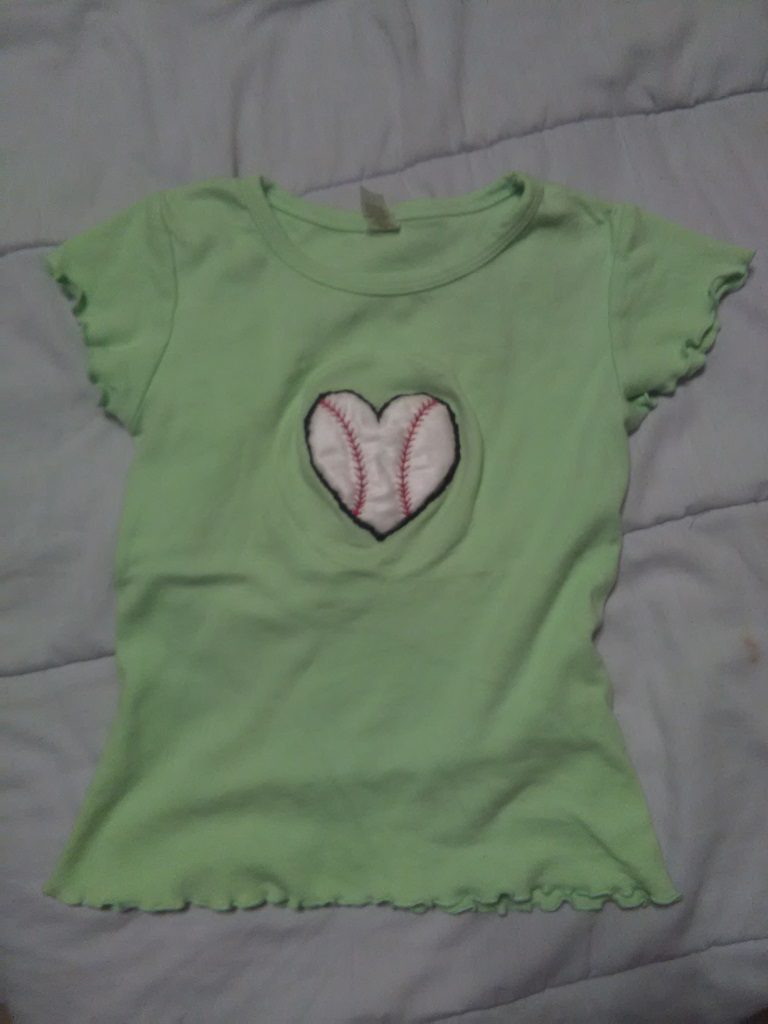
I finished Anya’s baseball t-shirt!
I sketched a quick heart in Photoshop, and drew in two lines of baseball-style stitching. The image was printed on Transfer EZE ‘paper’ using our laser printer (which answered the question: can you laser print on this stuff?). I then took a little scrap of quilt batting and laid it on the shirt. Placed a scrap of white satin on top, then stuck the Transfer Eze print onto the satin. It adhered quite well to satin – was a little concerned!
Put it in a hoop and embroidered the red stitching to hold the whole thing in place. I then trimmed the satin about a quarter inch outside of the heart’s lines; the batting was trimmed to be about a quarter inch smaller than the satin. Finishing the project was just needle turn appliqueing the heart to the shirt (using what amounts to a really short satin stitch).
The quilt batting really enhances the stitch definition for the red lines, and it makes the whole design puff out a bit from the shirt.
Anya’s preschool class has “baseball day” on Friday, and they are to wear their baseball shirts. It’s an interesting assumption that everyone has a baseball shirt to wear. Three years ago, I happened across an Indians t-shirt on post-season clearance. It was a size too large, but she grows. Beyond my “you cannot go wrong with a 4$ t-shirt” purchase, we don’t have anything baseball related. I don’t particularly want to pay inflated MLB-licensed in-season (and the Indians are doing well) prices.
I picked up a bunch of blank t-shirts for embroidered designs, so I decided to make Anya a baseball themed shirt. She chose the green shirt, and I drew a heart and added baseball stitching. The black and white image was printed on this Transfer Eze paper that I love. Then I cut out a slightly larger heart of white satin and a same-sized heart from a very thin quilt batting. Laid out the t-shirt, centered the quilt backing, then affixed the Transfer Eze heart to the satin and laid it on top of the batting. Going with the quilting principal of working from the center out to avoid bubbles, I started with the red stitching. Now I’m using a satin stitch around the edge to needle turn appliqué the whole thing onto the t-shirt.