I didn’t realize you could show the underlying field codes in MS Word. I had a problem with my table of contents showing too many levels. Looking up how to more granularity customize the levels, I found the suggestion of using “ALT + F9” and manually editing the field code.
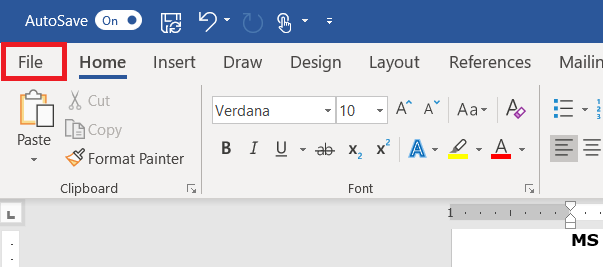
Being able to save documents directly to Teams, to sync documents and work on them locally, and to just store documents locally provides a lot of options when you’re saving a document. For me, though, a lot of options also means I’m not always sure which option I chose 😊 In which Teams space is this document saved? Did I stash it locally because I’m not ready for other people to peruse it?
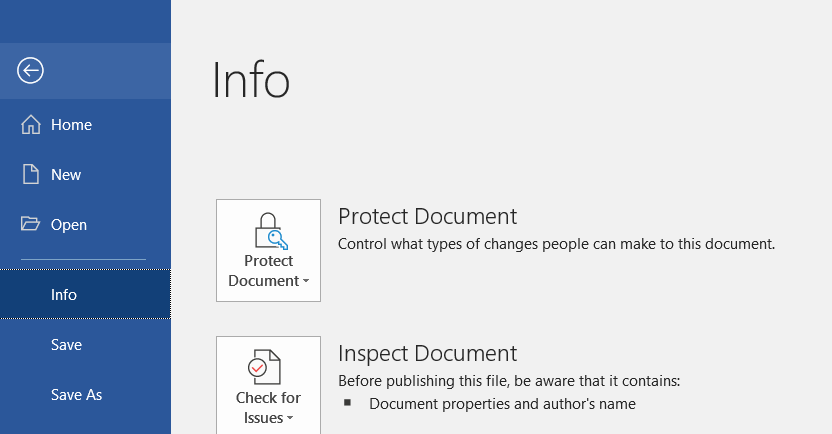
Luckily where the document is saved can quickly be displayed in the Office 365 applications. Click “File” on the ribbon bar.
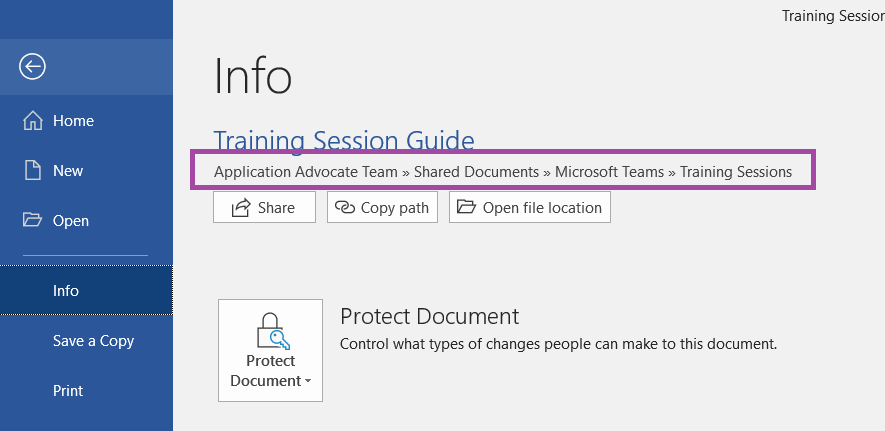
The “Info” section contains the path to the document – a document that is stored in a SharePoint document library (be that a Teams Channel file space or some other SharePoint document library) will include the SharePoint site name (the Team name in the case of Teams Channel files). Clicking “Open file location” will open a browser tab to the SharePoint document library which contains the file.
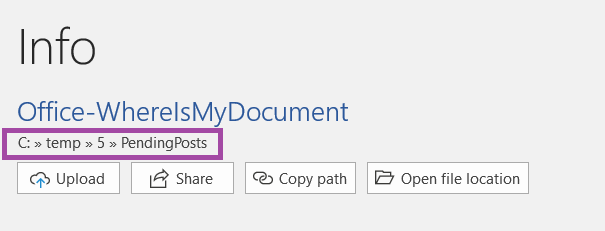
A document on a local or network drive will have a path starting with the drive letter. Clicking “Open file location” will open a File Explorer window to the folder containing the document.
And a document that hasn’t been saved won’t have any file information listed.
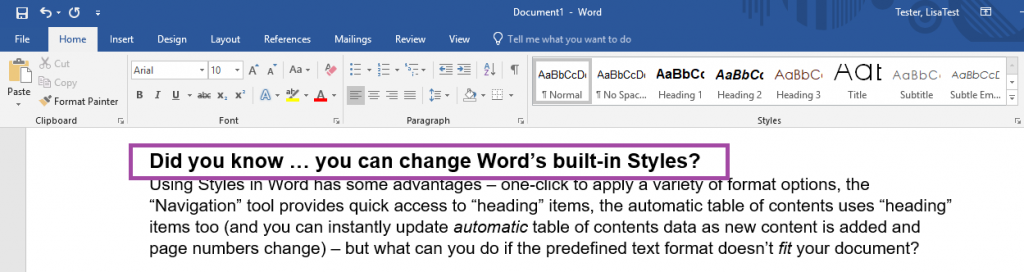
Using Styles in Word has some advantages – one-click to
apply a variety of format options, the “Navigation” tool provides quick access
to “heading” items, the automatic table of contents uses “heading” items too
(and you can instantly update automatic
table of contents data as new content is added and page numbers change) – but
what can you do if the predefined text format doesn’t fit your document?
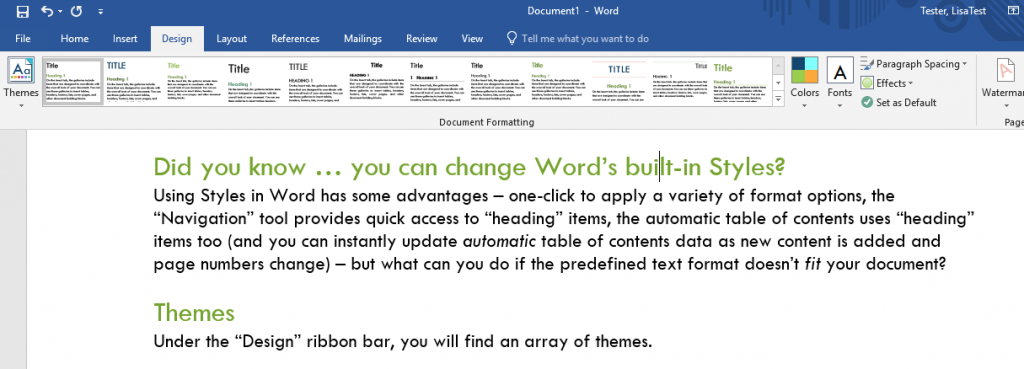
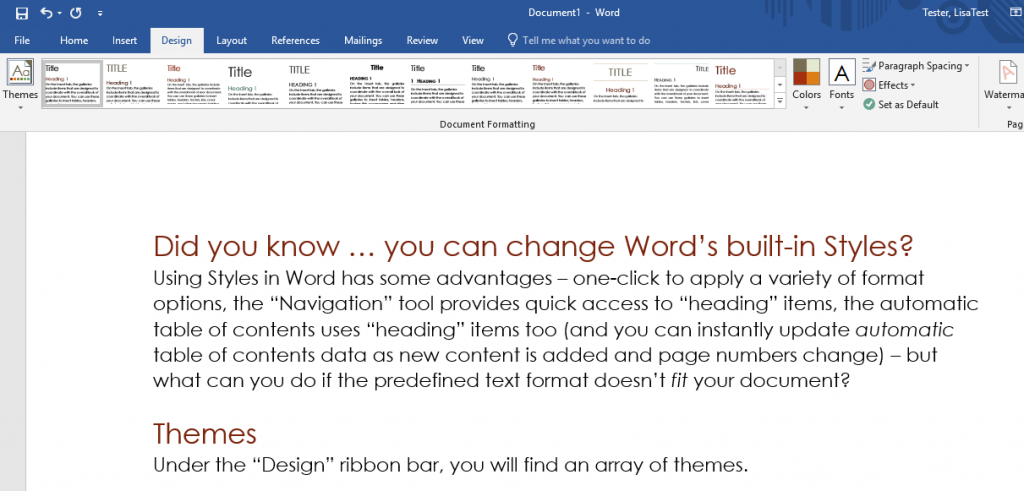
Themes
Under the “Design” ribbon bar, you will find an array of
themes.
Selecting a different one changes the colors, font faces, font
weight, and font sizes used throughout the document. You can change your document
to look like this
Or this
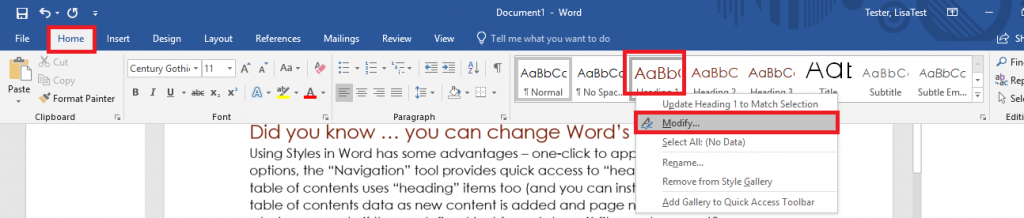
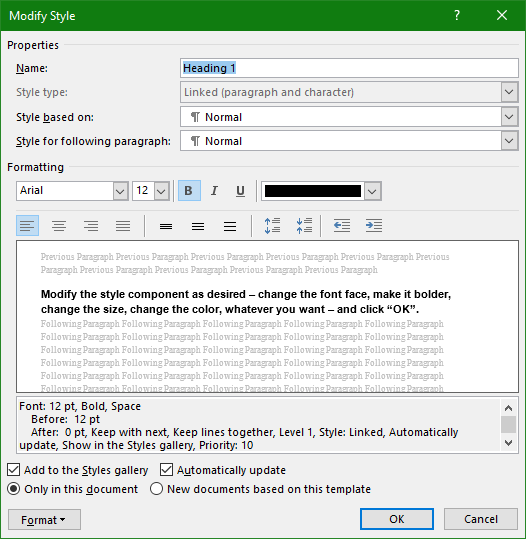
Customize Styles
What if the styles still
don’t fit your document? I, as an example, prefer my headings bolded and
sub-headings both bolded and italicized. You can customize a theme to match
your specific preferences.
On the ribbon bar, select “Home”. In the “Styles” section,
right-click on the style component you want to change and select “Modify”.
Modify the style component as desired – change the font face,
make it bolder, change the size, change the color, add a little more space
between lines, whatever you want. Click the box to ‘Update Automatically’ and,
if you want to use this customization in other documents, select the radio
button that says ‘new documents based on this template’. Click “OK”.
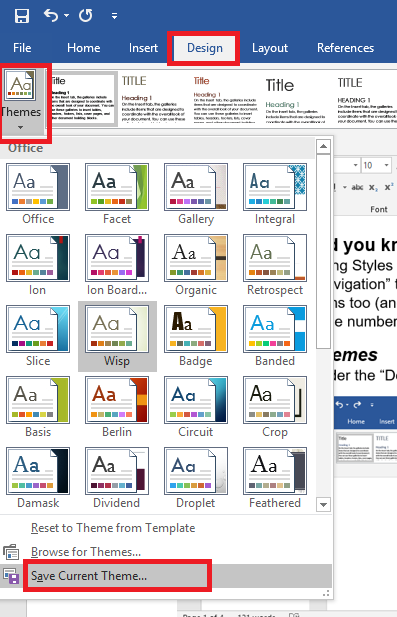
Sections of your document using that style component will be
updated. I have customized all of the
style components – normal, headings, title and subtitles, quotes, etc.
On the ribbon bar, select “Design”. Click the “Themes”
drop-down and select “save current theme”.
If you want to use your theme on every document you create,
click “Set as Default”.
As I’ve been writing these “Did you know” blog posts, I’ve needed
sample data to demonstrate how a function works. In Excel, that’s easy enough
as there are RAND()
and RANDBETWEEN(iLow,iHigh)
functions. But how do you get sample text in Word? I used to just paste in part
of a public domain work (as a cultural aside – the twenty years of copyright
protection added under the Sonny Bono Copyright Term Extension Act are up this
year, so the list of public domain works is expanding again). But what if you
don’t have the original Anglo-Saxon Beowulf laying around?
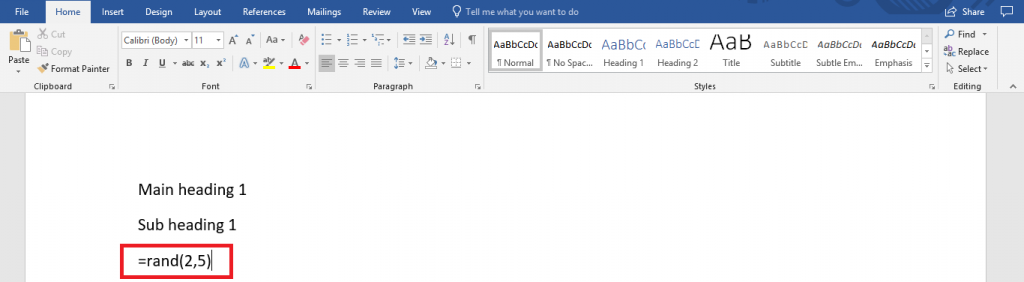
Microsoft Word has a rand() function too – type =rand(#Paragraphs,#Sentences)
The example here generates two paragraphs that are five
sentences each.
Hit enter – the formula is replaced with random text.
(This works in PowerPoint too). If you want some different text, try the lorem(#) function — the number in the parenthesis is the number of paragraphs — that uses the lorem ipsum paragraph as the content source.
How many times have you clicked a second time expecting to “paint” your format only to realize the format painter is a one-click deal-e-o. Well, it’s not — you just have to know the trick to ‘locking’ it on. Double click the format painter button — now you can paint as many things with the format as you like.
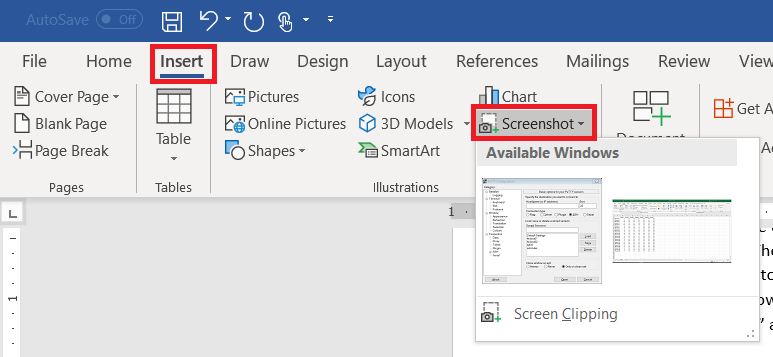
You’ve encountered some odd error in an application and need to send IT support a picture. Or you’rewriting documentation. There are lots of reasons you need a picture of your computer screen. You can hit the “Print Screen” button on your keyboard (even hold Alt and hit print-screen to isolate the image to the active window). But did you know Microsoft Office programs can do that for you? On the ribbon bar, select “Insert” and locate “Screenshot”
Click on one of the “Available Windows”, and an image of the window will be inserted into your Word document, Excel spreadsheet, Outlook e-mail, or PowerPoint presentation.
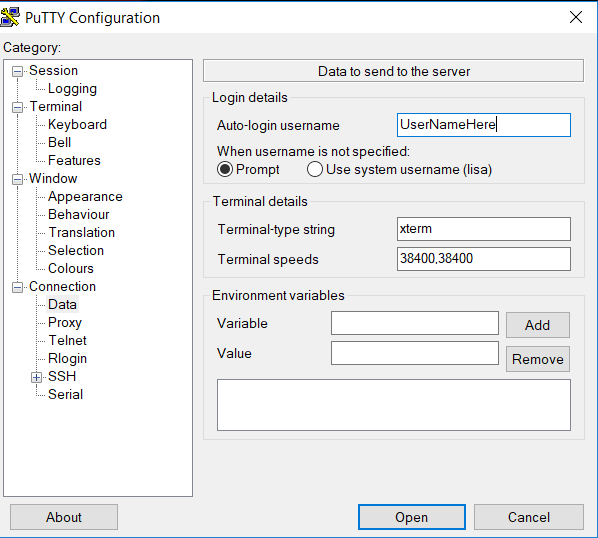
Use the “Screen Clipping”selection to grab part of a window. Minimize all of your Windows. Bring up the Window of which you want an image. Now bring up the Office document into which you want the image inserted. Use Insert => Screenprint => Screen Clipping, and wait a minute. Your Office document will be minimized, your screen will get washed out, and you’ll have a cross-hair instead of a mouse pointer. Click and drag to draw a rectangle around something. When you release the mouse, whatever is in that rectangle will be pasted into your Office document.
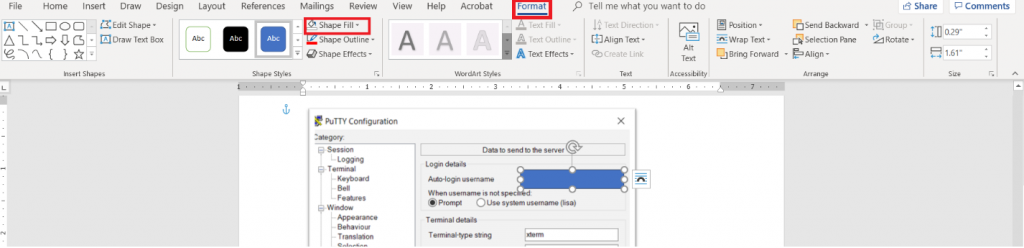
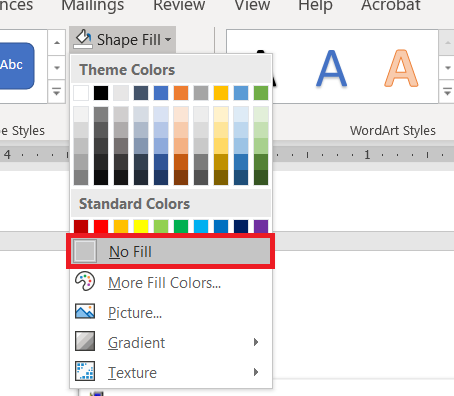
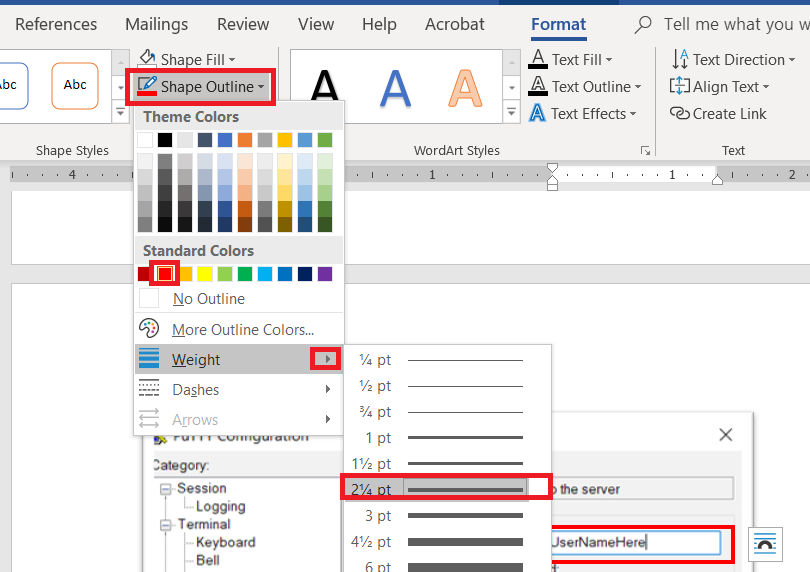
Wait – what about those rectangles I use to highlight the image? From the ribbon bar, select “Insert”and “Shapes”. I took a University course where debugging screen shots had to have the “important bit” highlighted with a red square – that stuck with me. You’ve got an array of shapes and colours available. Pick one. Draw the shape over your image – yes, it looks like the shape covers the important part. Draw it anyway. While the shape is still selected, click “Format” in the ribbon bar. Select “Shape Fill”
Select “No Fill” (you could also use a highly transparent fill colour if you’d prefer).
Click “Shape Outline” – pick a colour, and if the line is not thick enough select “Weight” to increase the line width.
When I’m writing documentation with a lot of images, I’ll still use an image editor and ‘print screen’. There are filters that just don’t exist in the Office image editors – sometimes I want to selectively blur screen text so my work conversations are not included in documentation. Sometimes I want to create a composite image. But for small documents – showing someone the error I get on their web site, “click here, type this” – using a single application is efficient.